Why Concrete Patios Outperform Every Other Option
Homeowners often start their patio research comparing wood decks, pavers, and concrete slabs side by side. Here is how they stack up based on what we see in the field across Iowa and Illinois properties.
- Concrete patio: 30 – 50 year lifespan | Seal every 2 – 3 years | Stamps, stains, color, exposed aggregate | Excellent freeze-thaw durability | 2 – 4 days to install
- Wood deck: 15 – 25 year lifespan | Stain and seal yearly | Stain colors, railing styles | Wood splits and warps | 5 – 10 days to install
- Paver patio: 25 – 35 year lifespan | Re-level and re-sand yearly | Shape, color, pattern | Pavers shift and heave | 3 – 7 days to install
Concrete wins on longevity and value in climates like ours in the Quad Cities. The freeze-thaw cycles in Davenport, Bettendorf, Moline, and Rock Island punish materials that absorb water. A properly mixed and sealed concrete slab sheds moisture rather than trapping it, which is why we see 30-year-old patios still performing while the deck next door has been replaced twice.
The other advantage is design range. Most people picture a plain gray slab when they hear “concrete patio.” That is the starting point, not the ceiling. Modern decorative concrete techniques can replicate the look of flagstone, brick, slate, or wood planking at a fraction of the material cost.
What Finish Options Are Available for a Concrete Patio?
Choosing a finish is the most important design decision you will make. Each option changes the texture, color, slip resistance, and maintenance schedule of your patio. Here are the five finishes we install most often.
Stamped Concrete
Stamped concrete uses textured mats pressed into freshly poured concrete to create patterns that mimic natural stone, brick, slate, or even wood grain. It is the most popular decorative option we install because it delivers high-end appearance at a mid-range price point.
- Best patterns for Midwest homes include Ashlar slate, cobblestone, and random stone
- Color is added with integral pigment and a contrasting release agent for depth
- Requires resealing every 2 – 3 years to maintain the pattern definition
- Works on patios, pool decks, walkways, and driveways
One thing we tell every client – stamp pattern selection matters more than color selection. A well-chosen pattern with a simple color scheme always looks better than a basic pattern with elaborate coloring. We bring physical stamp samples to every design consultation so you can see the texture and scale against your home’s exterior.
Stained Concrete
Staining transforms a plain slab into something that looks like polished natural stone. Two types are available, and they produce very different results.
- Acid stains react chemically with the concrete to produce rich, translucent, marbled tones. Earth tones – tans, browns, terra cottas, and soft greens – are the most natural-looking results
- Water-based stains offer a wider color palette including bold blues, reds, and blacks. The color is more uniform and predictable than acid staining
Staining works exceptionally well on existing patios that are structurally sound but visually outdated. Instead of tearing out and replacing a functional slab, we can stain and seal it for a fraction of the replacement cost.
Exposed Aggregate
Exposed aggregate reveals the natural stones within the concrete mix by washing away the top layer of cement paste before it fully cures. The result is a textured, slip-resistant surface with natural visual depth.
- Excellent traction when wet, making it ideal for pool decks and entryways
- Extremely durable with minimal maintenance
- Aggregate stone selection controls the final appearance – river rock, quartz, granite, or limestone each produce a distinct look
- Pairs well with stamped concrete borders for a two-tone design
Colored Concrete
Integral color is mixed directly into the concrete before pouring, so the color runs through the entire slab rather than sitting on the surface. This means scratches and minor chips do not expose a gray layer underneath.
- Available in dozens of earth tones, grays, and muted colors
- Can be combined with stamping or broom finishing
- Most fade-resistant option since the pigment is throughout the material
- Ideal for homeowners who want a subtle upgrade from standard gray without a bold decorative finish
Broom Finish
The classic broom finish is still the most cost-effective and practical option for many homeowners. A stiff broom dragged across the surface creates fine parallel lines that provide excellent traction in wet conditions.
- Lowest cost per square foot of any finish
- Best slip resistance of all options
- Clean, simple appearance that suits traditional and modern homes alike
- Can be paired with integral color for a low-cost upgrade
Do not underestimate a well-executed broom finish. We have installed plain broom-finished patios with clean edges and proper grading that look better than poorly executed stamped work from other contractors. Execution quality matters more than finish complexity.
What Does the Installation Process Look Like?
Understanding the process helps you plan around the disruption and know what to expect. A typical concrete patio installation takes 2 – 4 days of active work, plus curing time.
Step 1 – Design Consultation and Layout
We walk the site with you to discuss traffic patterns, furniture placement, grill locations, and how you actually use your backyard. The patio shape and size should match your real lifestyle, not just fill available space. We consider drainage slopes, sight lines from inside the house, and proximity to property lines.
Step 2 – Site Preparation
This is where shortcuts cause failures. We excavate to the proper depth (typically 8 – 10 inches below finished grade), compact the subgrade, and install a 4 – 6 inch compacted gravel base. In the Quad Cities, our clay-heavy soils demand thorough compaction to prevent settling and cracking.
Step 3 – Forming and Reinforcement
Wood or metal forms establish the patio shape and elevation. We install rebar or welded wire mesh for reinforcement and set control joints to manage where the concrete will crack naturally. Proper joint spacing prevents random cracking across your patio surface.
Step 4 – Pour and Finish
Concrete is placed, screeded level, and finished according to the selected technique. For stamped patios, timing is critical – the stamps must be applied when the concrete is firm enough to hold the pattern but soft enough to accept the impression. This window can be as short as 30 minutes in hot weather.
Step 5 – Curing and Sealing
Concrete reaches full strength at 28 days, but you can walk on it after 24 – 48 hours. We apply a high-quality sealer that protects against moisture penetration, freeze-thaw damage, and UV fading. We recommend keeping vehicles and heavy furniture off the surface for at least 7 days.
Common Concrete Patio Mistakes (and How to Avoid Them)
After years of installing patios and fixing other contractors’ work, these are the mistakes we see most often.
Skipping the Gravel Base
Pouring concrete directly on dirt – especially the clay soils common in Davenport and the Quad Cities – is the fastest path to cracking and settling. Clay expands when wet and contracts when dry. A compacted gravel base absorbs that movement so the slab does not have to.
Ignoring Drainage
A patio must slope away from your home’s foundation at a minimum of 1/8 inch per foot. We see patios poured flat or even sloping toward the house, which directs rainwater straight into the basement. Proper grading is planned before the first form board goes in, not corrected after the pour.
Choosing the Wrong Sealer
Not all sealers are equal. Penetrating sealers protect against moisture and salt damage without changing the surface appearance. Film-forming sealers add a wet-look sheen but can become slippery when wet and may peel in high-traffic areas. We match the sealer type to the finish and the patio’s use case.
Cutting Costs on Reinforcement
A patio without rebar or wire mesh is a patio waiting to crack apart. Reinforcement does not prevent hairline control joint cracks – those are normal and intentional. It prevents the slab from separating into independent pieces that shift at different rates.
Pouring Too Thin
Residential patios need a minimum 4-inch thickness. Areas that will support hot tubs, fire pits, or vehicle traffic need 5 – 6 inches. We have torn out patios that were poured at 2 – 3 inches because the homeowner was told it would “be fine.” It was not fine.
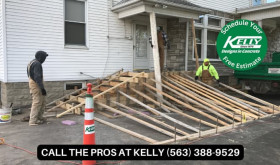
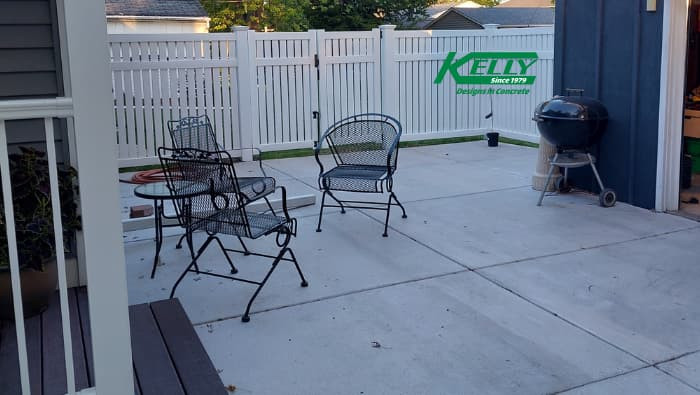
Real Project: From Bare Yard to Outdoor Living Space
The best way to understand what a concrete patio can do for your home is to see a real project come together.
We recently completed a backyard patio installation that transformed an unusable grass area between the house and garage into a functional outdoor living space. The homeowner wanted a clean, low-maintenance surface for dining, relaxing, and grilling – without the annual upkeep of a wood deck.
The finished patio connects the back door to the garage with a generous concrete pad, providing room for a bistro dining set, additional seating, and a charcoal grill. A white vinyl privacy fence frames the space and creates a comfortable, enclosed feel without blocking airflow.
Here is what the homeowner had to say after spending their first afternoon on the new patio:
“We’re taking advantage of this nice weather to enjoy our patio. Thanks to you and your crew. We’re looking forward to this being the first of many enjoyable afternoons.”
– Steve, Quad Cities homeowner
That is the reaction we work for on every project. A concrete patio is not just a slab – it is an extension of your living space that you should look forward to using every day the weather cooperates.
Frequently Asked Questions
How long does a concrete patio last?
A properly installed and sealed concrete patio lasts 30 – 50 years with minimal maintenance. The key factors are adequate base preparation, proper thickness (minimum 4 inches), quality reinforcement, and resealing every 2 – 3 years. We have seen well-maintained patios in the Quad Cities still performing after 40 years.
Can you pour a concrete patio over an existing slab?
In some cases, yes. If the existing slab is structurally sound with no major cracks or settling, we can apply a concrete overlay or stain treatment. If the old slab has heaved, settled unevenly, or cracked into separate pieces, removal and replacement is the better long-term investment.
When is the best time of year to pour a concrete patio in Iowa?
The ideal pouring season in the Quad Cities runs from late April through mid-October when daytime temperatures stay consistently above 50 degrees Fahrenheit. Spring and fall pours actually cure more slowly than summer pours, which produces a stronger final product. We avoid pouring when temperatures are expected to drop below freezing within the first 48 hours.
How soon can I use my new patio?
You can walk on the patio after 24 – 48 hours. Light furniture can go on at 7 days. We recommend waiting the full 28-day cure period before placing heavy items like hot tubs or large planters. Stamped and decorative patios should have their first sealer application within 30 days of the pour.
Do concrete patios crack?
All concrete develops hairline cracks over time – that is normal. Control joints are cut into the slab specifically to control where cracks form, directing them along straight, inconspicuous lines rather than randomly across the surface. Proper base preparation, reinforcement, and joint spacing minimize cracking significantly.
How do I maintain a concrete patio?
Maintenance is simple. Sweep or blow off debris regularly, clean with a garden hose or pressure washer once or twice a year, and reseal every 2 – 3 years. Avoid using deicing salts during the first winter – use sand for traction instead. After the first year, a concrete-safe deicer can be used sparingly.
Ready to design your concrete patio? Contact Kelly Designs in Concrete for a free design consultation. We serve Davenport, Bettendorf, Iowa City, Moline, Rock Island, and surrounding Quad Cities communities.
« Spring 2026: Elevate Your Outdoor Living with Modern Stamped Concrete in the Quad CitiesGarage Floor Coating Eastern Iowa | What to Know Before You Buy »